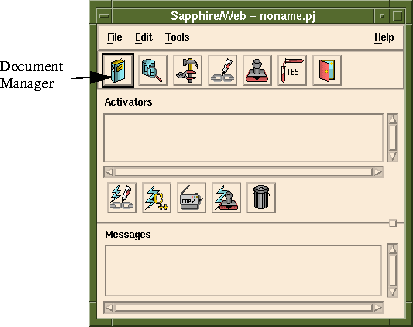
saweb.sh is working correctly. Please skip down to "saedithtml.sh."
If Sapphire/Web is not running, begin by setting the SAPPHIRE environment variable. This tells the shell where Sapphire/Web is located. The command env will list all environment variables and their values.
To set SAPPHIRE to sapphire_home:
setenv SAPPHIRE sapphire_home
SAPPHIRE=sapphire_home; export SAPPHIREIf you have not already done so, please run:
$SAPPHIRE/InstallThis script will also check for database configuration and set up libraries under SunOS or Solaris. If you have not already done so, run:
$SAPPHIRE/bin/saweb.sh &This should start Sapphire/Web. If it does this, then
saweb.sh is working correctly.noname.pj), click on the Document Manager button or select the menu item Tools->Document Manager.Create New HTML) then type:test.htmlClick
Ok.If your editor comes up with an HTML template, this script is correct. Please skip to the "sabrowser.sh" section.
If your editor does not come up, the most likely problem is that Sapphire/Web cannot locate it. From the command line (in an xterm), edit $SAPPHIRE/bin/saedithtml.sh by invoking your editor. For example:
% vi $SAPPHIRE/bin/saedithtml.shWe have included a vi reference table at the end of this chapter for your convenience.
At the beginning of saedithtml.sh, there is an environment variable called EDITOR. Please change that to reflect your preferred HTML editor. Example-if you want to use /usr/local/bin/emacs, change the line from:
EDITOR="xterm -e vi"
EDITOR="xterm -e /usr/local/bin/emacs"
saweb.sh section. To make sure your web browser is configured, please do the following: test.html. Then click the Preview HTML button (fig. 3-2).
test.html file displayed. If this happens, sabrowser.sh is working correctly. Skip down to the "samake.sh" section of this chapter.
% vi $SAPPHIRE/bin/sabrowser.sh
saedithtml.sh, there is an environment variable called BROWSER. Please change that to reflect the full path for your preferred web browser. Example: if Netscape is not in your path, but is in /pkg/ns-2.0, change the line from
BROWSER=netscape
BROWSER=/pkg/ns-2.0/netscapeYou can find the full path of Netscape in your system with the command
which netscape.
You may wish to define the browser on a per-user basis rather than system-wide. To do this, copy sabrowser.sh into a project/bin directory and make changes to it. Then set the PATH environment variable such that project/bin is before the $SAPPHIRE/bin directory in your path. This will cause Sapphire/Web to load browser-related information from your personal sabrowser.sh rather than the system-wide version.
On systems with limited resources, you may see the Netscape logo flashing when you enter and leave the browser. Change the -install option of netscape to -ncol 90 to avoid this by limiting the number of colors that Netscape uses.
	% mkdir /tmp/foo
	% cd /tmp/foo
$SAPPHIRE/bin/saweb.sh &Once Sapphire/Web has started, bring up the Document Manager by clicking the
Document Manager icon or by selecting the menu item Tools->Document Manager.Create New HTML icon (fig. 3-2) or select the menu item File->Create.
begin.html as the name of the first HTML document.
begin.html to the following.
	<HTML>
	<HEAD><TITLE> First Document </TITLE></HEAD>
	<BODY>
	This is the first document. Click
	<A HREF="GO">here</A> to go to the next.
	</BODY>
	</HTML>
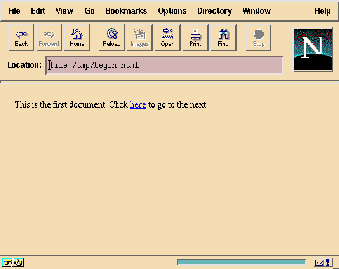
end.html.
end.html to the following.
	<HTML>
	<HEAD><TITLE> Final Document </TITLE></HEAD>
	<BODY>
	This is the final document. Cool.
	</BODY>
	</HTML>
Object Bind Editor (New Activator) icon or by selecting the menu item
Tools->Object Bind Editor.
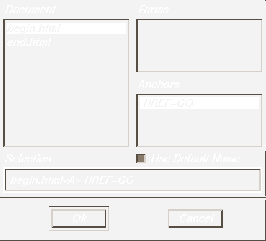
Document section select begin.html. Under the Anchors section, select HREF=GO. Click Ok.
NULL, then click Ok.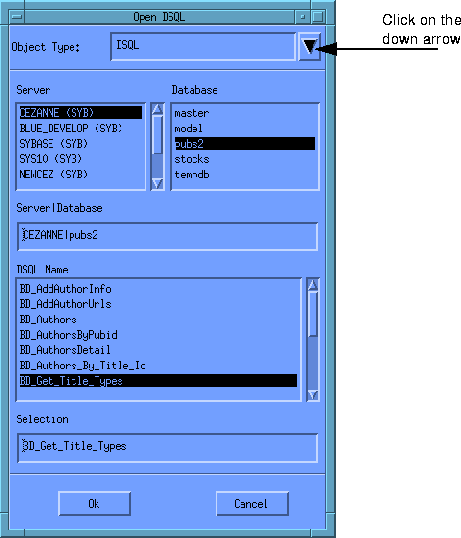
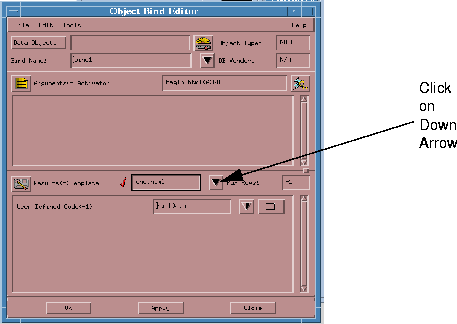
Results<=>Template down arrow and then select end.html. Click Ok. Since this is a NULL binding, no additional work is required. The Object Bind Editor will close and the Project Window will appear.
File->Build Project. Sapphire/Web will prompt you for a project file.
test.pj. If you see the following messages, samake.sh is configured correctly.
	Compiling test.c [ANSI C]
	Compiling begin.c [ANSI C]
	Linking test.cgi
	Finished Linking
$SAPPHIRE/bin/samake.sh and change the line
MAKE=make
MAKE=make_location
make_location is the full path to the location of make on your system. You can find the full path to make with the command which make. Also, make sure that the setting "CC=" in the file $SAPPHIRE/config/Makefile.tem is pointing to a valid compiler/linker.
sabrowser.sh and samake.sh); make sure that these two scripts are configured correctly. In order to use satest.sh, there are four configuration options that need to be set: CGI test Path, CGI test URL, HTML test Path, and HTML test URL. % mkdir /tmp/foo % cd /tmp/foo
$SAPPHIRE/bin/saweb.sh &
Edit->Options. At the Category popup menu, select the Test category. You will now change the four options listed above.
/home_directory/public_html/cgi-bin
/home_directory is your home directory. If you plan to install your CGIs to a different machine, this option should have the form
machine:/home_directory/public_html/
/some_location/cgi-bin
/some_location/ then the CGI URL would be set to:
http://machine/cgi-bin
/home_directory/public_html/
/home_directory is your home directory. If you plan to install your HTML documents to a different machine, this option should have the form:
machine:/home_directory/public_html/cgi-bin
/some_location/docs/
/some_location/docs then the HTML URL would be set to:
http://machine/
Ok once these options are set. In the Project window, click the Test button or select the menu item File->Test. Your web browser should appear with the first page.
end.html page.
Edit->Save Options.